A kitchen sink sprayer is a handy appliance installed with the faucet that helps you clean the sink and utensils.
You have to change the kitchen sink sprayer nozzle when the holes get clogged due to the accumulation of dirt or debris.
How to Replace a Kitchen Sink Sprayer Nozzle? You can replace a kitchen sink sprayer nozzle by removing the mounting bolts with the help of a wrench and moving the hose through the sink. Then, remove the nozzle head using adjustable pliers and pull out the metal chip present under the rubber washer. Next, you have to replace the old sprayer nozzle with the new sprayer head. Attach it with the hose, tighten its parts, and sprayer head using a hand or adjustable wrench. Finally, the new sprayer nozzle is fixed, and you can check it by turning on the valve.
The right type of kitchen sprayer helps you do the tasks more efficiently and quickly.
You can quickly move it around the sink to remove the stubborn stains and wash the corners.
Moreover, it helps to fill the container quickly, and you can wash vegetables or fruits with it.
Easy steps to change the kitchen sink sprayer nozzle
Changing the broken or damaged sprayer nozzle is easy and requires some tools for installation. Firstly, you have to decide the suitable size and brand of the sprayer nozzle.
It is suitable to use the same brand of kitchen faucet and spray nozzle as it goes well with the whole set.
Then you have to look for a suitable size with good pressure or flow that is compatible with the hose. Finally, make sure that you select the same color and fits well with your needs.
After choosing the suitable sprayer head, you have to turn off the water valves under the sink to avoid a mishap.
You have to open the kitchen tap to drain out the leftover water from the pipes. After this, you have to disconnect the mounting nut present under the sink with an adjustable wrench and unscrew the piece with your hand.
Take it out, and then you have to remove the old sprayer nozzle by using adjustable pliers. Loosen up the sprayer to take it off, and then you have to look for the small metal clip beneath the washer.
The metal clip looks like a horseshoe, and you have to use a small screwdriver to remove it from the surface. Next, you have to pull it off and separate the part from the hose.
Then slide off the old bolt from the hose and replace it with the new piece. After this, pull the hose through the opening and attach the new base piece with it.
Tighten the piece beneath the sink and attach the new sprayer head with the hose. Install the new metal clip with the wrench carefully, and then put the plastic or rubber washer on the top of it.
In the final step, connect the new kitchen sprayer nozzle and tighten it with the help of the hand. Then, open the water valves and check the nozzle spray by pressing the button.
Why would you replace a kitchen sink sprayer nozzle?
You have to replace the kitchen sink sprayer nozzle due to the damage and leakage in the sprayer head.
Many people replace this kitchen sprayer head due to various reasons. Here are the details:
Reduced water pressure
The pressure of the water lowers due to the accumulation of minerals in the sprayer nozzle aerator.
In some kitchens, people use hard water, which leads to the buildup of limescale. In addition, it prevents the water from coming out of the holes, and it takes more time for cleaning.
The low water flow is due to the clogging of the cartridge and aerator.
The mineral deposits block the water and reduce the pressure. Some people use a water softener to fix this issue, and finally, they have to replace the sprayer nozzle.
The water flow decreases due to the buildup of calcium and magnesium.
It is annoying as less water is coming outside and you have to spend a lot of time in the kitchen to clean the utensils or rinse the vegetables. However, you can fix it by replacing the damaged part.
Clogged holes of sprayer nozzle
Kitchen sink sprayer nozzles need regular cleaning to remove the dirt or dust accumulation.
The sprayer is more exposed to the water and results in poor functionality due to the clogging.
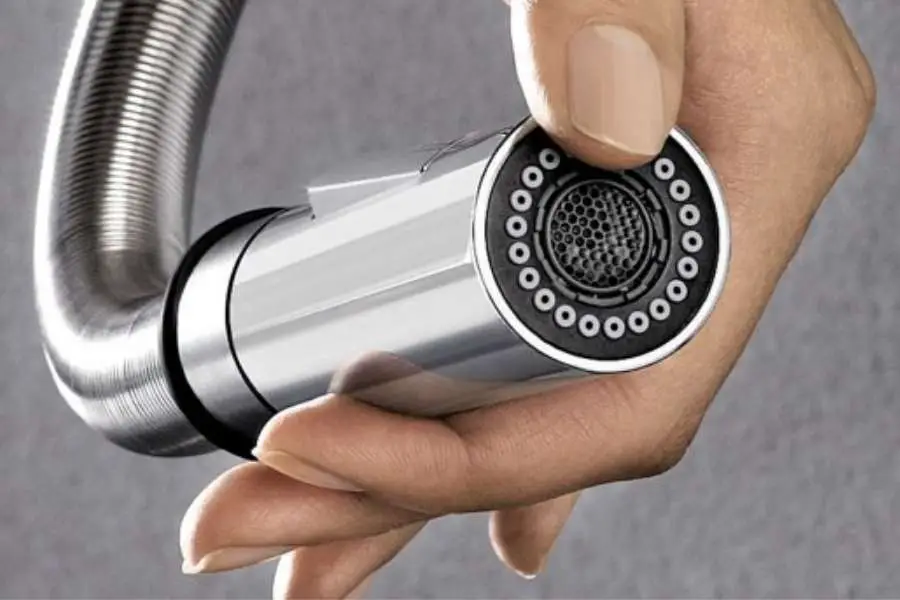
The holes are present on the sprayer nozzle from which water is coming outside. The holes become clogged due to the poor cleaning and maintenance of the nozzles.
Moreover, the dirt or debris accumulates on the surface when you do not clean it properly. Also, the dirt is stuck inside and blocks the water movement.
Sometimes the food residues get inside the spray nozzle when you leave the sprayer nozzle in the sink. Also, these get blocked even after cleaning it as the surface of the aerator is damaged.
In addition, the water is coming through some openings with reduced pressure. Then you have to replace the sprayer head to solve this problem by choosing a suitable sprayer.
My friend recently replaced the kitchen sink nozzle head to fix the issue.
Leakage in sprayer head
You have to replace the kitchen sprayer nozzle due to water leakage from the sprayer head. The leakage results in water wastage, and the rust accumulates on the surface.
The rust turns the surface of the sprayer head brownish-orange, and it looks terrible.
The leakage may be due to the damaged or broken washers that result in water dripping.
Some people fix this by wrapping it with tape, although this is not the permanent solution.
Sometimes the overtightening of the O rings damages it, and the water leaks through it.
Moreover, the loose O rings are responsible for the water dripping through the sprayer head. Also, the plastic material is damaged due to the constant seeping of water and needs replacement.
You can replace the O-shaped rings or washers and tighten it clockwise direction. However, you have to replace the sprayer nozzle headpiece to fix the issue.
Damaged or broken sprayer body and diverter
The sprayer body of the kitchen sink stops working due to the damage on the surface. Moreover, the surface of the sprayer breaks as it slips from your hands.
The damaged part leads to water splashes, and the water comes out oddly from the holes. As a result, the kitchen floor gets wet and causes slipping.
Sometimes the sprayer body bends due to the wrong positioning, and the water leaks from the hose joint.
The Diverter sends water in the sprayer nozzle when you press the trigger. Any damage to the sprayer body results in decreased water flow, and with time it stops working.
Some people say that the broken sprayer body makes their kitchen messy, and they have to clean it.
Replacing the damaged product is a suitable solution, and you can easily do it by yourself.
You have to select a new headpiece and install it on the hose for proper functioning.
The sprayer button stops working
Many people complain that the spray piston of the kitchen sprayer nozzle gets hard and stops working.
It leads to the malfunctioning of the sprayer nozzle as the piston gets hard or blocked. Sometimes the overpressing of the button results in damage to the piston, and water will not pass through it.
It gets hardened due to the accumulation of rust on the surface as the water drips out of it.
Some people say that it stops working as the piston breaks and the trigger stops working. Moreover, the sprayer takes out less water from the nozzle as it gets old.
You cannot replace the button; instead, you can change the sink sprayer nozzle to fix this issue.
Related Articles:
Ideas to Make a Kitchen Not Look Like a Kitchen
What causes White Kitchen Cabinets to Turn Yellow?